


Nigerian Meat Pie
(Crispy, Flaky & Deliciously Loaded!)
If there’s one snack that never disappoints, it’s a perfectly made meat pie, crispy on the outside, rich and savory on the inside, and satisfying with every single bite. There’s something incredibly satisfying about biting into a perfectly made meat pie, the crisp, flaky crust giving way to a rich, savory filling that’s warm, buttery, and deeply flavorful. Not the dry, disappointing kind… but the real bakery-style meat pie that keeps you coming back for more.
If you’ve ever wondered why some meat pies taste next level, this recipe reveals all the secrets. From using flavor-packed meat stock instead of plain water, to the perfect butter-to-flour ratio that creates that irresistible flaky texture every step here is designed to give you professional results right from your kitchen.
And the best part? This recipe is incredibly practical. You’ll learn how to
- Make a moist, rich filling (never dry!)
- Achieve that perfect flaky dough
- Store, freeze, and bake later (perfect for busy days or food business prep)
Whether you’re cooking for your family, prepping snacks for the week, or thinking of starting a small pastry business, this recipe is about to become your go-to.
Let’s get into it!
Why You’ll Love This Meat pie Recipe

- Crispy, golden exterior with a flaky bite
- Rich, juicy, and well-seasoned beef filling
- Easy to customize with veggies or different proteins
- Perfect for snacks, parties, or meal prep
- Beginner-friendly and budget-friendly
- Can be baked or fried
Ingredients for this Meat pie Recipe
For the Filling
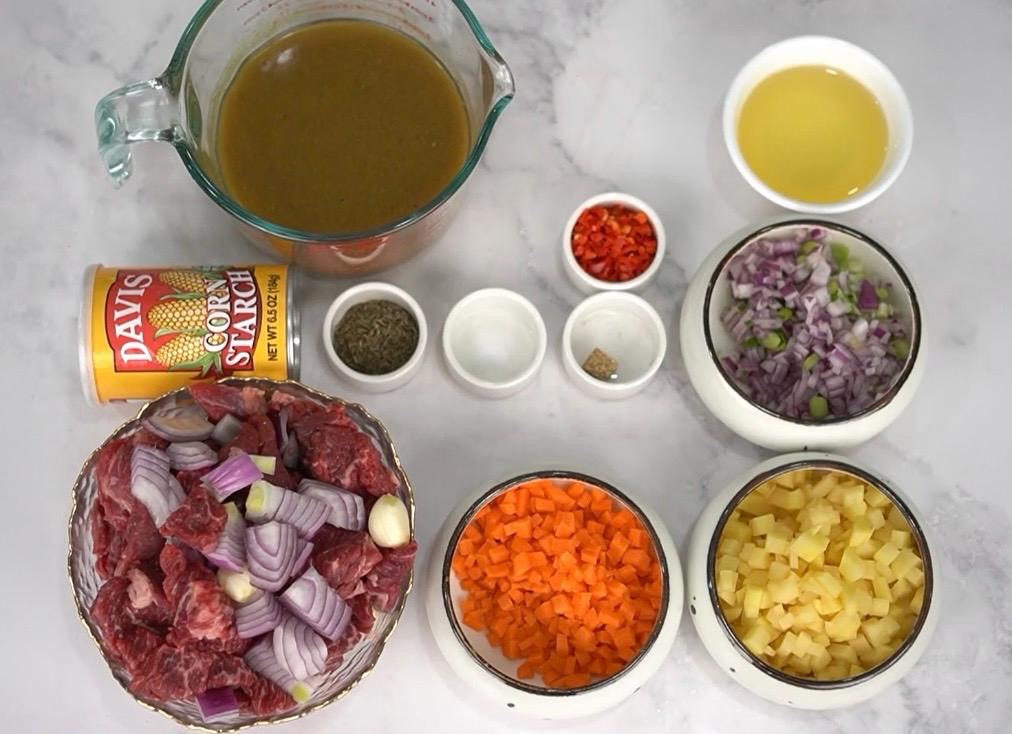
- 500g beef (minced or blended)
- 2 medium potatoes, diced
- 1 carrot, diced
- 1 small bell pepper, diced
- 1 onion, chopped
- 2 cloves garlic, minced
- 1–1½ cups meat stock
- 1 tsp thyme Salt & seasoning to taste
- 1 tbsp oil
- 1 tbsp cornstarch + water (slurry)
- 1 tbsp butter (for finishing)
For the Dough
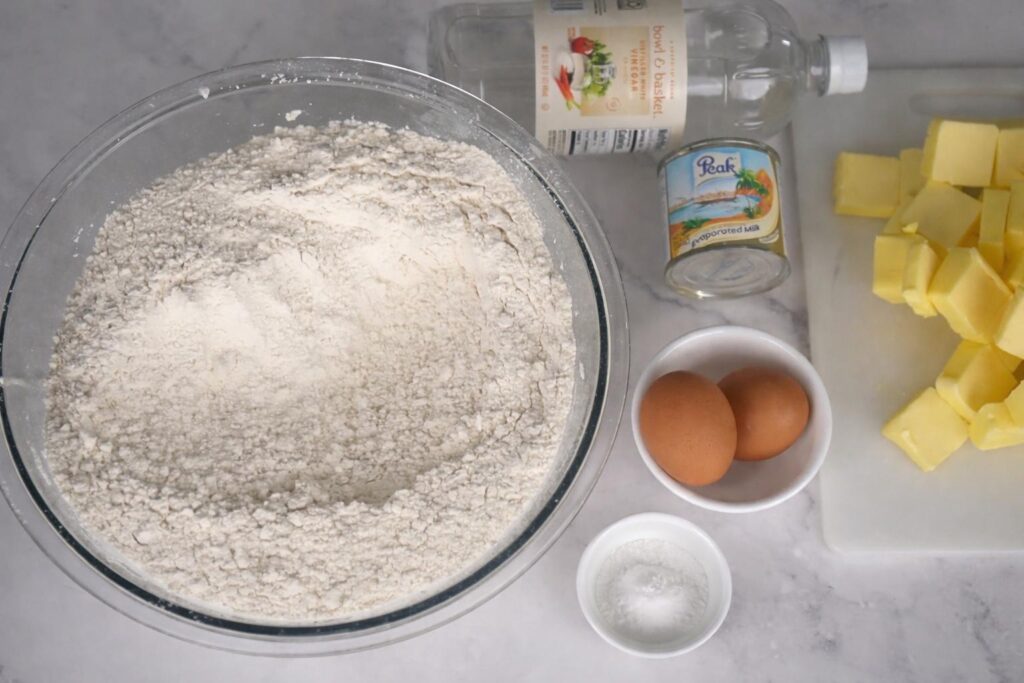
- 1kg all-purpose flour
- 500g cold butter
- 2 eggs
- 2 cups cold evaporated milk
- 1 tbsp vinegar
- Salt to taste
For Assembly
- Egg wash (egg + a little milk)
Instructions
Step 1: Prepare the Beef Filling
- Heat oil in a pan
- Add onions, spring onions, and bell peppers
- Sauté for 1–2 minutes until fragrant
Add minced beef and cook until no longer pink. (Benefits of beef in your diet)
Step 2: Season & Cook
- Add thyme, chili pepper, seasoning, and salt
- Stir well and cook for 1–2 minutes
- Add water and carrots
- Cover and cook for 5–7 minutes
Step 3: Thicken the Filling
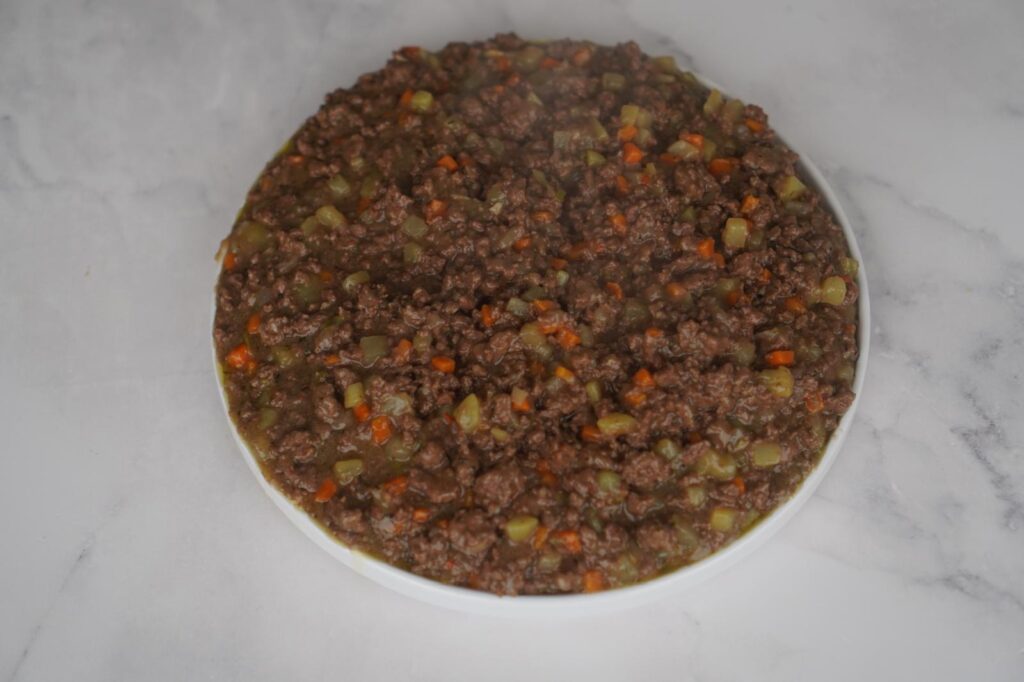
- Add cornflour slurry
- Stir until thick and well combined
- Optional: add fresh onions for extra flavor
Set aside to cool completely.
Step 4: Make the Dough
- In a bowl, mix flour, salt, and baking powder
- Add cold butter and rub until crumbly
- Add eggs, milk, and vinegar gradually
- Add grated onion and cold water
- Mix gently to form a soft dough
Important: Do not overwork the dough.
Step 5: Rest the Dough
- Wrap dough and refrigerate for 20 minutes
Step 6: Roll & Shape
- Roll out dough (not too thin, not too thick)
- Cut into circles
- Add filling to one side
- Brush edges with water
- Fold and seal with a fork
Step 7: Bake
- Place on greased tray
- Poke small holes on top
- Bake at 350°F (180°C) for 30–35 minutes Until golden brown (Learn about safe frying /baking temperatures)
Remove and drain on paper towels.

Pro Tips
- Always use cold butter for flaky pastry
- Bake frozen pies at 375°F directly – no need to thaw!
- Let filling cool before using
- Roll thinner for extra crispiness
Serving Suggestions
Enjoy your meat pies with
- Chilled Chapman drink
- Fresh fruit juice
- Hot tea or coffee
You can also serve alongside
- Homemade Shawarma Recipe (for a full snack combo)
- Chicken Alfredo Pasta (for a full meal option)
Storage Tips
- Refrigerate: Freeze unbaked pies for up to 2 months
- Freeze: Store baked pies for up to 3 days
- Reheat: Warm in oven for best texture
Frequently Asked Questions (FAQs)
Why is my meat pie dry?
This usually happens when you use water instead of meat stock or skip the slurry. Meat stock and cornstarch help retain moisture.
Can I freeze meat pies?
Yes! Freeze them before baking and bake directly from frozen at a slightly higher temperature.
What makes the dough flaky?
Cold butter and minimal handling of the dough create that flaky texture.
Can I use chicken instead of beef?
Absolutely! Chicken works perfectly and gives a lighter flavor.
Final Thoughts
This isn’t just another meat pie recipe this is the one that changes everything. From the buttery, flaky crust to the rich, juicy filling, every bite delivers that authentic bakery-style experience right from your kitchen.
Whether you’re making it for your family, meal prepping for the week, or even starting a small food business, this recipe is reliable, practical, and truly unforgettable.
And honestly… once you try this, those store-bought meat pies just won’t hit the same anymore.
When you try it, don’t forget to share your results, I’d absolutely love to see what you create! 😊


You May Also Like
Fluffy Pancakes
Beef & Vegetable Fried Rice
Pasta Salad
Turkey & Corn pepper soup
HI, I’M Joyful Cook
In the kitchen, I find joy in experimenting with flavors, crafting unique dishes, and sharing my love for food with others...
Connect with me
Recent Recipes